Balances and scales are very precise instruments and
like all instruments, they perform within stated
parameters.
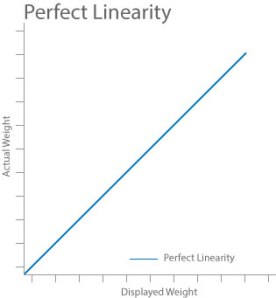
Basically, linearity is a deviation (or no deviation)
from a straight line. If we draw a graph with weight at
one side and displayed value on the other, a purely
linear balance would show a straight 45° line from the
zero point, right up to full capacity. Each time the
load increases, the displayed value increases at the
exact same rate, thus giving the straight line. See Fig.
1. (Please note that the errors in the graphs used below
are exaggerated to provide clarity).

Figure 1
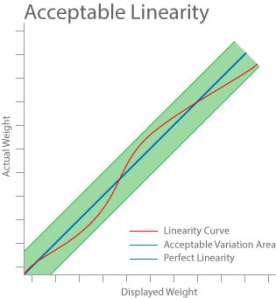
In Fig. 2. We see an example of the allowed linearity
of an analytical balance of 200 g with an allowable
linearity of ± 0.0002 g. This example shows the error
allowed around the “perfect” linearity. The green shaded
area represents the permissible error allowed.

Figure 2
In Fig. 3. We show the typical linearity of a 200 g
balance, with a slight positive error (0.0001 g) below
100 g and a slight negative error over 100 g of 0.0002
g. This balance is just within specification.

Figure 3
In Fig. 4. We see a balance that is just outside the
tolerance allowed, as the curve of the displayed value
exceeds the ±0.0002 g permissible error.

Figure 4
Manufacturers and scale dealers have the ability to
correct errors in linearization by adjusting the balance
with test weights at regular intervals of the capacity.
Linearization is not calibration that can be performed
with a single weight. Linearization should not be
attempted without specialist knowledge and the correct
test weights.